I've started my second round of Wilton cake decorating classes. This is the second set of classes in the 4 part series. This class focuses on flowers and cake design. Flowers are everyone's favorite thing to make anyway.
Last night we learned about the basics of working with fondant and gum paste and then we made two flowers.
The first flower was made using a special flower press. It cut the gum paste and stamped a design on it at the same time. We just layered the different flower bits on top of each other and left them to dry.
The second flower was a basic pansy. We used the same gum paste, a thin piece of foam, and a ball tool and made the petals of the flower curl slightly. We layered a couple of the petals to make it 3-D and that was it.
These flowers were easy to make but can still make a huge impact on a homemade cake. I can't wait for next week.
Wednesday, February 15, 2012
Monday, February 13, 2012
Hibachi Soup
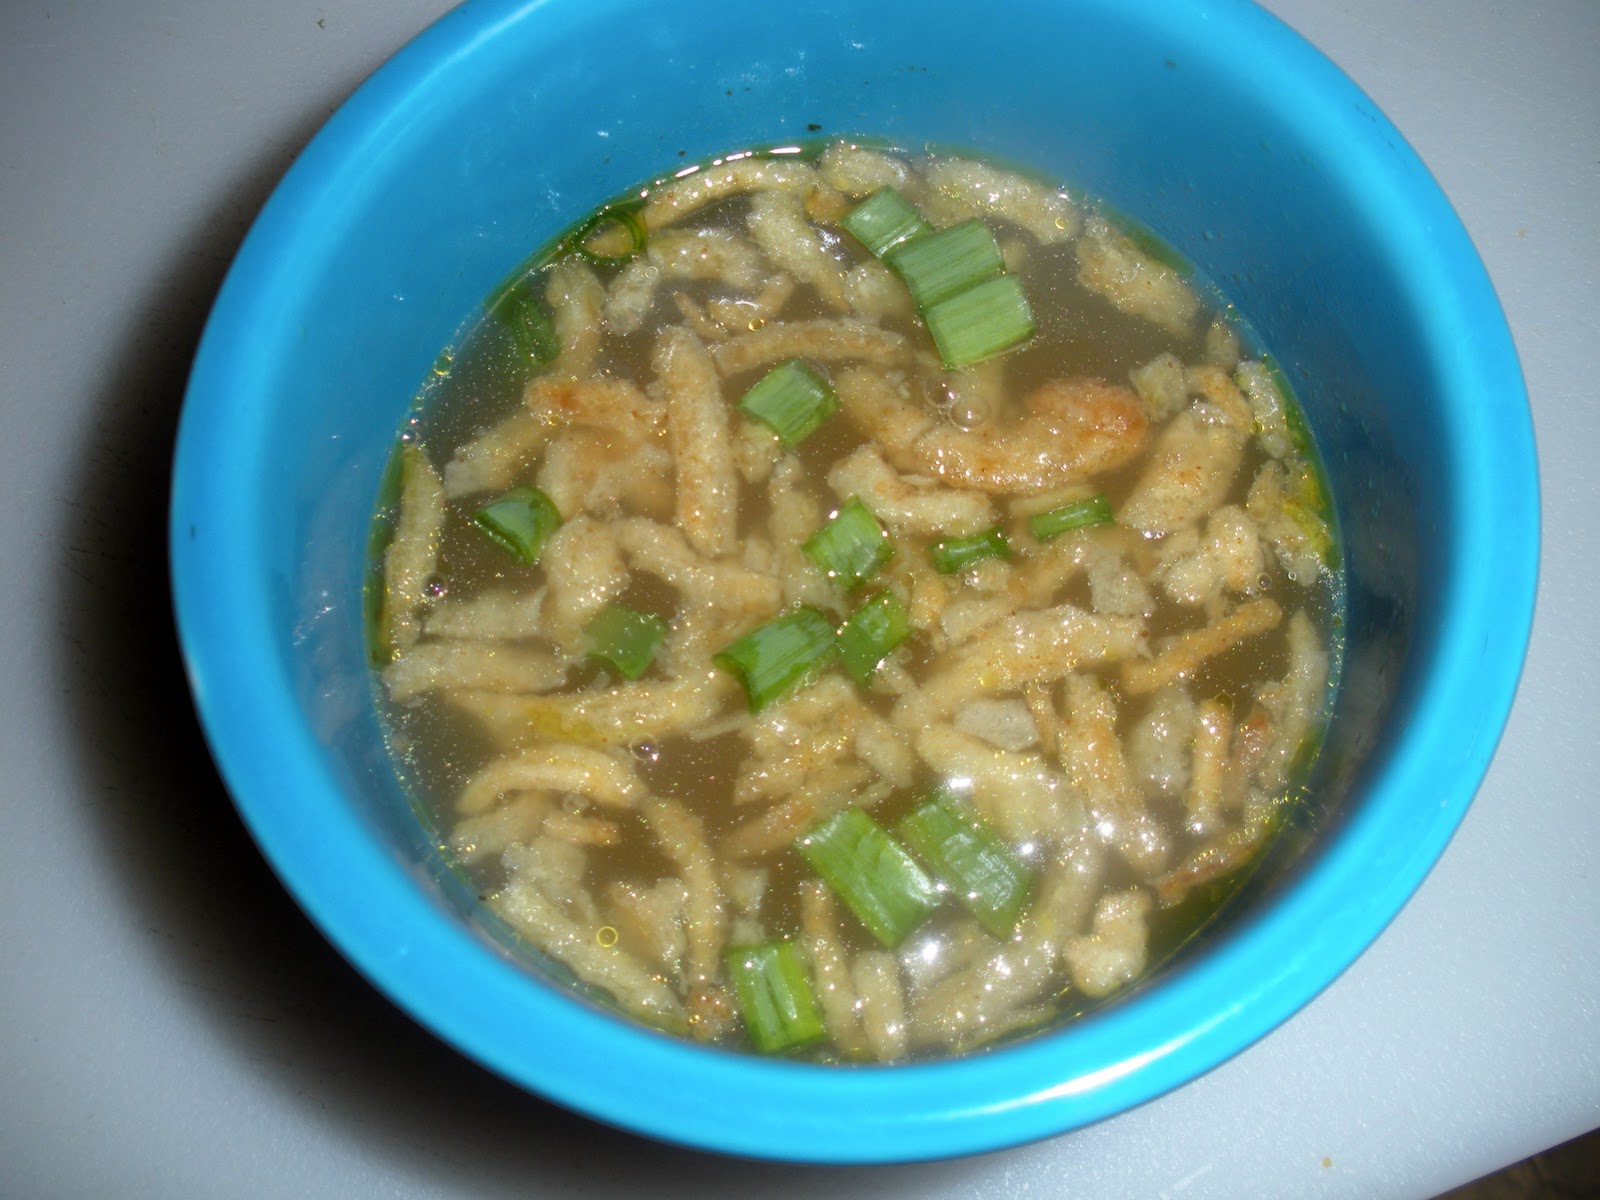
We like to frequent our local Japanese Steakhouse for special dinners, like my birthday! One of my favorite parts of the experience is the soup that they serve. I love brothy soups and this is the perfect brothy soup.
It can also be made gluten free by using gluten free bouillon cubes and skipping out on the french fried onions (or making your own). Not all bouillon cubes are gluten free but these are. I know that my local grocery store sells them.
Hibachi Soup:
(found on Pinterest, from Cooking with Carrie)
Ingredients:
1/2 stalk celery, chopped
1 small onion, chopped
2 carrots, chopped
2 tablespoons ginger, chopped
3 garlic cloves, minced
2 tablespoons chicken bouillon granules
3 tablespoons beef bouillon granules
1 cup thinly sliced mushrooms
2 quarts water (8 cups)
French fried onions
Directions:
In a large saucepan or stockpot, combine the celery, onion, carrot, ginger, garlic, and a few of the mushrooms. Add chicken bouillon, beef bouillon, and water. Place the pot over high heat, and bring to a rolling boil. When the mixture reaches boiling, cover, reduce heat to medium, and cook for 45 minutes.
After it's cooked for at least 45 minutes strain the cooked soup and discard all of the vegetables, leaving the broth. Serve the broth with sliced mushrooms and sprinkle french friend onions over the top.
It can also be made gluten free by using gluten free bouillon cubes and skipping out on the french fried onions (or making your own). Not all bouillon cubes are gluten free but these are. I know that my local grocery store sells them.
Hibachi Soup:
(found on Pinterest, from Cooking with Carrie)
Ingredients:
1/2 stalk celery, chopped
1 small onion, chopped
2 carrots, chopped
2 tablespoons ginger, chopped
3 garlic cloves, minced
2 tablespoons chicken bouillon granules
3 tablespoons beef bouillon granules
1 cup thinly sliced mushrooms
2 quarts water (8 cups)
French fried onions
Directions:
In a large saucepan or stockpot, combine the celery, onion, carrot, ginger, garlic, and a few of the mushrooms. Add chicken bouillon, beef bouillon, and water. Place the pot over high heat, and bring to a rolling boil. When the mixture reaches boiling, cover, reduce heat to medium, and cook for 45 minutes.
After it's cooked for at least 45 minutes strain the cooked soup and discard all of the vegetables, leaving the broth. Serve the broth with sliced mushrooms and sprinkle french friend onions over the top.
Sunday, February 12, 2012
Weekly Meal Plan: February 12th
I'm posting a meal plan for the first time in forever. I've been making one every week but just haven't been posting it.
Honey barbecue meatloaf
Grilled fish tacos
Vegetarian lo mein
Buffalo Chicken Tacos
Crock Pot Chili
Honey barbecue meatloaf
Grilled fish tacos
Vegetarian lo mein
Buffalo Chicken Tacos
Crock Pot Chili
Wednesday, February 8, 2012
Wilton Cake Decorating- Class #4
I'm finished with my first round of cake decorating classes!! Impressed? (You should be) Here's a recap from my final class for session #1.
We did more flower work this week and worked on our final cake. The cake was decorated and pre-iced at home. In case you're wondering I made a basic yellow cake with a strawberry filling.
We also worked on writing. The instructor showed us how to write in print and cursive. Print isn't for me so I stuck with cursive.
We also learned how to make some basic ribbon roses. It is important when making roses to have your icing tip facing the correct way. The rose on the left was made with the tip upside down. Whoops.
We took the rest of the class to work on our final cakes. I am the prime example of why you should have an idea of what you want your cake to look like before you start decorating it. Whatever, my coworkers enjoyed eating it the next day... plus, I had a lot of fun.
We did more flower work this week and worked on our final cake. The cake was decorated and pre-iced at home. In case you're wondering I made a basic yellow cake with a strawberry filling.
We also worked on writing. The instructor showed us how to write in print and cursive. Print isn't for me so I stuck with cursive.
We also learned how to make some basic ribbon roses. It is important when making roses to have your icing tip facing the correct way. The rose on the left was made with the tip upside down. Whoops.
We took the rest of the class to work on our final cakes. I am the prime example of why you should have an idea of what you want your cake to look like before you start decorating it. Whatever, my coworkers enjoyed eating it the next day... plus, I had a lot of fun.
Monday, February 6, 2012
Chicken Ropa Vieja
I was so happy to find this recipe the other day. I had to work late and needed to figure out something to do for supper that night. My plan was to use this chicken in tacos but I forgot to buy shells. It didn't really matter because the chicken was really good and super moist.
(It also works really well for leftovers)
Chicken Ropa Vieja:
(Skinnytaste- 5pp+, 4 servings)
Ingredients:
3 (22.5 oz) chicken breast halves
1 small onion, quartered
1 tomato, quartered
1 carrot, peeled and chopped
2 cloves garlic, peeled
1 tbsp olive oil
1 small onion, thinly sliced
1 small green bell pepper, seeded and thinly sliced
1 small red bell pepper, seeded and thinly sliced
1/4 cup dry white wine
1/2 cup tomato sauce
Reserved broth
1 tsp cumin
Garlic powder
Salt and pepper to taste
Directions:
Place chicken, onion, tomato, carrot, and 2 cloves of garlic into crock pot. Add water to cover, and set to high for 4 hours until the chicken is tender. If cooking on the stove, cook on medium-low, and simmer until the chicken is tender, 30 to 40 minutes. Place the chicken into a bowl and shred it into strips using a fork; set aside. Reserve the liquid.
In a large deep skillet, heat olive oil over medium heat. Add the garlic, onions, green peppers, and red peppers. Cook about 3 to 4 minutes. Stir in chicken, tomato sauce, white wine, and about 3/4 cup of the reserved broth to create a nice sauce. Season with cumin, garlic powder salt, and pepper. Cover and simmer on low for about 10 minutes more adding more broth and seasoning if needed.
(It also works really well for leftovers)
Chicken Ropa Vieja:
(Skinnytaste- 5pp+, 4 servings)
Ingredients:
3 (22.5 oz) chicken breast halves
1 small onion, quartered
1 tomato, quartered
1 carrot, peeled and chopped
2 cloves garlic, peeled
1 tbsp olive oil
1 small onion, thinly sliced
1 small green bell pepper, seeded and thinly sliced
1 small red bell pepper, seeded and thinly sliced
1/4 cup dry white wine
1/2 cup tomato sauce
Reserved broth
1 tsp cumin
Garlic powder
Salt and pepper to taste
Directions:
Place chicken, onion, tomato, carrot, and 2 cloves of garlic into crock pot. Add water to cover, and set to high for 4 hours until the chicken is tender. If cooking on the stove, cook on medium-low, and simmer until the chicken is tender, 30 to 40 minutes. Place the chicken into a bowl and shred it into strips using a fork; set aside. Reserve the liquid.
In a large deep skillet, heat olive oil over medium heat. Add the garlic, onions, green peppers, and red peppers. Cook about 3 to 4 minutes. Stir in chicken, tomato sauce, white wine, and about 3/4 cup of the reserved broth to create a nice sauce. Season with cumin, garlic powder salt, and pepper. Cover and simmer on low for about 10 minutes more adding more broth and seasoning if needed.
Friday, February 3, 2012
Wilton Cake Decorating- Class #3
We did even more decorating this week. We finally got to work on flowers and leaves! (It's my favorite part) In order to keep those flowers under control a little bit we decorated cup cakes. They were the perfect size to practice on.
These were the first flowers we made. I don't remember what they called it. Please excuse the color choices, I was being lazy.

The second flowers we made were called "Shaggy Mums". They were made by placing the leaves where ever you want and covering them with these little strings of icing. They are my favorite.
I decided to go nuts and combine my flowers on my final cupcakes. Go big or go home. Here's what I came up with.
These were the first flowers we made. I don't remember what they called it. Please excuse the color choices, I was being lazy.

The second flowers we made were called "Shaggy Mums". They were made by placing the leaves where ever you want and covering them with these little strings of icing. They are my favorite.
I decided to go nuts and combine my flowers on my final cupcakes. Go big or go home. Here's what I came up with.
Wednesday, February 1, 2012
Sesame Chicken Tenders
This is another new recipe that i'm trying out. I'm always looking for new ways to eat chicken. I was really happy with how crispy these were and how easy they were to make.
There is a really big taste of sesame in these. I know how obvious that sounds but for me it went from 0 to 60 within a couple of bites. Next go around I might leave out the sesame oil and just stick with the sesame seeds but test it out for your self and decide how much sesame taste you love.
Sesame Encrusted Baked Chicken Tenders:
(skinny taste- 5pp+, 4 1/2 servings)
Ingredients:
18 oz chicken tenderloins
salt and pepper to taste
2 teaspoons sesame oil
2 teaspoons low sodium soy sauce
6 tablespoons toasted sesame seeds
1/2 teaspoon course salt
4 tablespoons panko bread crumbs
olive oil spray
Directions:
Preheat oven to 425°. Spray a baking sheet with non-stick oil spray.
Combine the sesame oil and soy sauce in a bowl, and the sesame seeds, salt and panko in another.
Place chicken in the bowl with the oil and soy sauce, then into the sesame seed mixture to coat well. Place on the baking sheet; lightly spray the top of the chicken with oil spray and bake 8 - 10 minutes. Turn over and cook another 4 - 5 minutes longer or until cooked through.
There is a really big taste of sesame in these. I know how obvious that sounds but for me it went from 0 to 60 within a couple of bites. Next go around I might leave out the sesame oil and just stick with the sesame seeds but test it out for your self and decide how much sesame taste you love.
Sesame Encrusted Baked Chicken Tenders:
(skinny taste- 5pp+, 4 1/2 servings)
Ingredients:
18 oz chicken tenderloins
salt and pepper to taste
2 teaspoons sesame oil
2 teaspoons low sodium soy sauce
6 tablespoons toasted sesame seeds
1/2 teaspoon course salt
4 tablespoons panko bread crumbs
olive oil spray
Directions:
Preheat oven to 425°. Spray a baking sheet with non-stick oil spray.
Combine the sesame oil and soy sauce in a bowl, and the sesame seeds, salt and panko in another.
Place chicken in the bowl with the oil and soy sauce, then into the sesame seed mixture to coat well. Place on the baking sheet; lightly spray the top of the chicken with oil spray and bake 8 - 10 minutes. Turn over and cook another 4 - 5 minutes longer or until cooked through.
Subscribe to:
Posts (Atom)